How To Install Software Packages in Ubuntu and Linux Mint
Overview:
This guide describes multiple common methods for installing software packages in the Ubuntu Linux operating system.
Page Contents
Are you new to Ubuntu Linux and want to learn how to install software packages on your system? There are various ways to install software packages or programs on Ubuntu, however, the most frequently used methods are discussed below.
Keep in mind that:
- Installing and removing software in Ubuntu and other Linux distributions requires root privileges,
- You can use the sudo command to gain root privileges,
- You will not find all software in the default Ubuntu repositories,
- You can install third-party software by adding third-party repositories to your system, and
- Importantly, you should always install software from trusted sources/repositories.
Using the “Ubuntu Software Center” to Install Packages
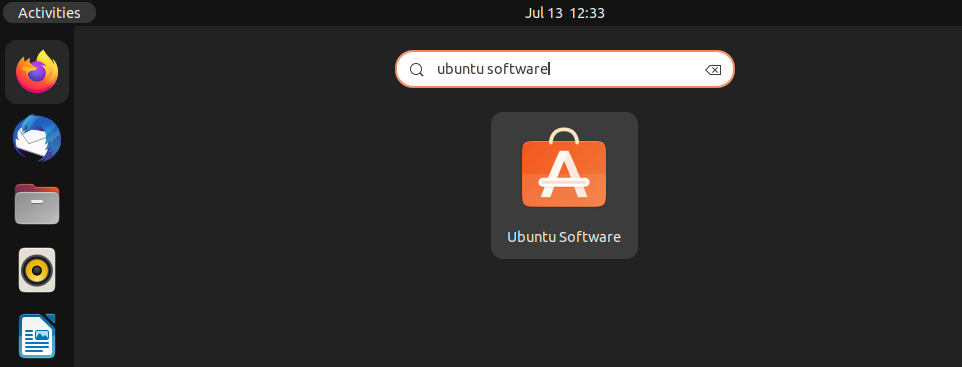
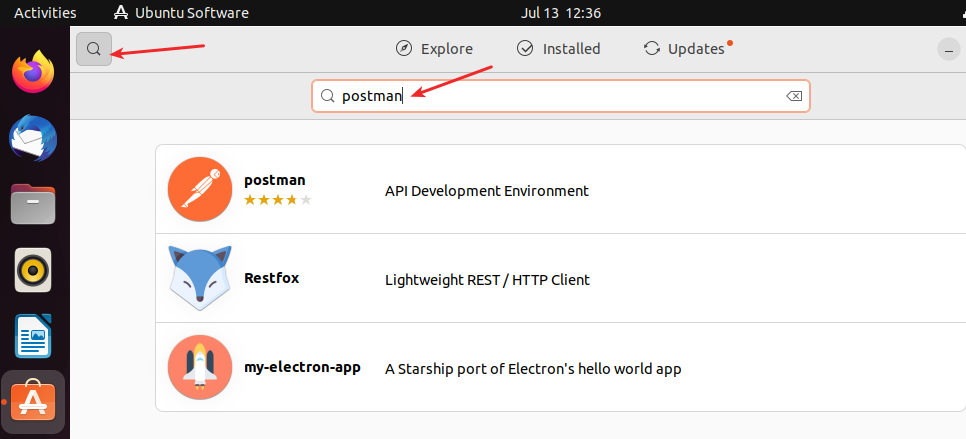
Click the Applications menu or Activities, then search for the Ubuntu Software application as shown in the following screenshot.
Once the Ubuntu Software application opens up, search for the software you want to install. In this example, I have searched for the Postman API development environment.
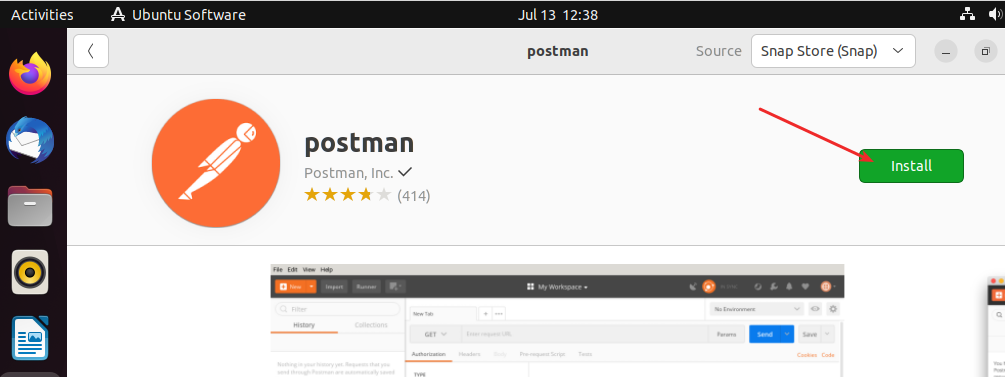
Next, click on the software from the search results and then the Install button.
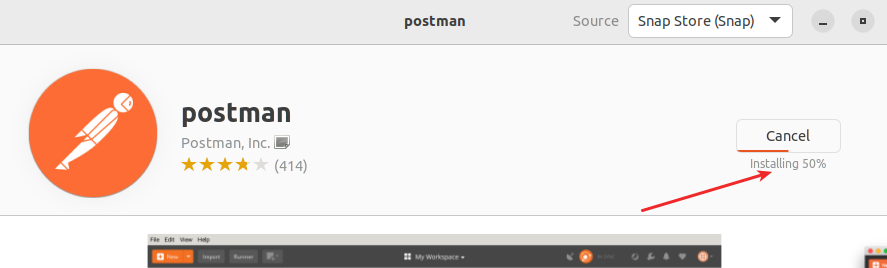
Next, the system will prompt you for your account password. Enter it to authenticate and start the installation process.

Once the installation process starts, the system will display a progress percentage. The installation process will run for a few seconds to munites, and wait for it to complete.
Using the Terminal to Install Packages in Ubuntu
Another common means of installing software in Ubuntu is via the terminal. Using the terminal, you can either install packages from the default repositories or manually added(third-party) repositories or use a .deb file or PPA(Personal Package Archives) as explained below.
Install Packages from Default Ubuntu Repositories
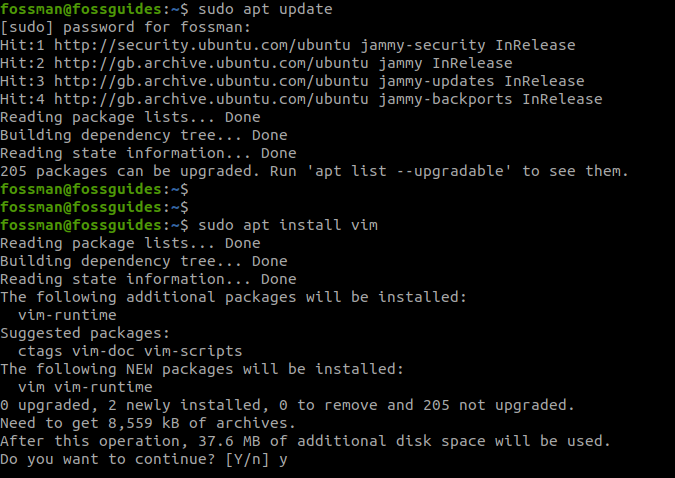
Open the terminal by searching for it in the Applications menu or by pressing Ctrl+Alt+T. After it opens, run the following command to update the local package index:
$sudo apt-get update
Then run the next command to install the package. Remember to replace Vim with the name of the package you wish to install. The -y option implies yes to all prompts while the command is running.
$sudo apt-get install vim
OR
$sudo apt-get -y install vim
Then wait for the installation process to complete to start using the package or application or program.
Install Packages from Third-party Repositories
Many software packages are not available in the default Ubuntu APT repositories but exist in third-party repositories. Sometimes if they exist in the default repositories, you will find older versions. You must add a third-party software repository to Ubuntu’s list of available repositories before you can install software from it.
Caution: Remember to always add software repositories only from trusted sources! Third-party software repositories are not vetted for security or dependability by Ubuntu members and may include malware.
For example, to install Docker on Ubuntu, you need to run the following commands to install the prerequisite packages, add the required repository and its key, update the local package index, and install the Docker packages:
$sudo apt-get update
$ sudo apt-get install ca-certificates curl gnupg
$sudo install -m 0755 -d /etc/apt/keyrings
$curl -fsSL https://download.docker.com/linux/ubuntu/gpg | sudo gpg --dearmor -o /etc/apt/keyrings/docker.gpg
$ sudo chmod a+r /etc/apt/keyrings/docker.gpg
$echo   "deb [arch="$(dpkg --print-architecture)" signed-by=/etc/apt/keyrings/docker.gpg] https://download.docker.com/linux/ubuntu   "$(. /etc/os-release && echo "$VERSION_CODENAME")" stable" | sudo tee /etc/apt/sources.list.d/docker.list > /dev/null
$sudo apt-get update
$sudo apt-get install docker-ce docker-ce-cli containerd.io docker-buildx-plugin docker-compose-plugin
Install Third-party Software Using Auto-Install Scripts
Another commonly used means of installing software in Ubuntu is using third-party auto-install or convenience scripts. Usually, developers will provide some instructions and recommendations to use the provided scripts, always read such instructions before using a script. Besides, some scripts are not intended for use in production environments.
For example, to easily install the latest version of Docker on your development computer, you can use the convenience script(which is recommended for production environments). The first command enables you to download the script and the next command runs the script:
$curl -fsSL https://get.docker.com -o get-docker.sh
$sudo sh get-docker.sh
Install Software Using its .deb Package
If you can’t use an APT repository to install a software package in Ubuntu, you can download the .deb file for the package and install it manually. This example shows how to install the Google Chrome deb package.
First, download the deb package. In this case, we will download the Google Chrome software from the Google website.
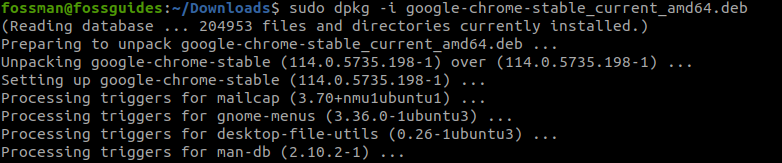
Then run these commands to move into the Downloads folder and install the package using the dpkg command:
$cd Downloads
$ sudo dpkg -i google-chrome-stable_current_amd64.deb
On a Ubuntu desktop, you can also double-click on the .deb file to open it with the Ubuntu Software Center. Then click on the Install button and wait for the installation process to finish.
Install Software Using a PPA
Personal Package Archives (PPA) allow developers to upload Ubuntu source packages to be built and published as an apt repository by Launchpad. To install a software package from a PPA, you need to add the PPA to your system.
This guide shows how to install the shutter, a feature-rich screenshot application, using its official PPA. The first command adds the PPA to the system, then the next updates the local package list and the other installs the package:
$sudo add-apt-repository ppa:shutter/ppa
$ sudo apt-get update
$ sudo apt install shutter
Conclusion
In this guide, we have shown different ways to easily install software packages in Ubuntu and its derivatives such as Linux Mint and many others. We hope you found the guide useful. If you have any questions or comments, use the comment form below to post them here.