How To Install Docker in Ubuntu
Overview
This guide shows how to install Docker in various versions of Ubuntu (Ubuntu Bionic 18.04 (LTS), Ubuntu Focal 20.04 (LTS), Ubuntu Jammy 22.04 (LTS), Ubuntu Kinetic 22.10, and Ubuntu Lunar 23.04 from the official Docker APT repository.
Page Contents
Docker is a popular software development tool intended for quickly packaging an application together with all its dependencies as an image(and shipping it around), and running it as a container in any IT environment. Yes, any IT environment where these operating systems can run: Linux-based OSes, Windows, and macOS.
Whether on a laptop, desktop, server; in the cloud; in a Raspberry Pi, or other ARM-based devices, you can use Docker to package your application with everything needed and run it much more easily, efficiently, and reliably in a container.
Note: This guide will also work well for versions of other Linux operating systems derived from respective Ubuntu versions.
Debian guide: How To Install Docker in Debian 10/11/12
Remove Old Docker Versions from Ubuntu
First, if you have any old versions of Docker packages (docker, docker.io, or docker-engine; containerd or runc) installed, remove them using this command:
$ sudo apt-get remove docker docker.io docker-engine runc contained
To start using a clean Docker installation, you may want to remove any old images, containers, volumes, and other Docker objects from your system, by deleting the /var/lib/docker and /var/lib/containerd directories, as follows:
$ sudo rm -rf /var/lib/docker
$ sudo rm -rf /var/lib/containerd
Configure the Docker APT Repository on Ubuntu
Next, run the following commands which will update the local apt package index, then install the required packages to allow the APT package manager to access repositories over HTTPS:
$ sudo apt-get -y update
$ sudo apt-get -y install curl gnupg lsb-release ca-certificates
The next step is to add Docker’s official GPG key with these commands:
$ sudo install -m 0755 -d /etc/apt/keyrings
$ curl -fsSL https://download.docker.com/linux/ubuntu/gpg | sudo gpg --dearmor -o /etc/apt/keyrings/docker.gpg
$ sudo chmod a+r /etc/apt/keyrings/docker.gpg
Then install and configure the required Docker APT repository with this command:
$ echo "deb [arch="$(dpkg --print-architecture)" signed-by=/etc/apt/keyrings/docker.gpg] https://download.docker.com/linux/ubuntu "$(. /etc/os-release && echo "$VERSION_CODENAME")" stable" | sudo tee /etc/apt/sources.list.d/docker.list > /dev/null
Install Docker Engine on Ubuntu
Once the required APT repository is installed and configured, you can now install update the local APT package index once more and install the Docker Engine, containerd, plugins, and Docker Compose packages by running these commands:
$ sudo apt-get -y update
$ sudo apt-get -y install docker-ce docker-ce-cli containerd.io docker-compose-plugin docker-buildx-plugin
What to Do After Installing Docker Engine on Ubuntu
At this point, you should have the Docker Engine installed on your system. Now there are a few optional post-installation steps to execute on your system to ensure that the Docker service is running and also set it up to work more efficiently, they are explained below.
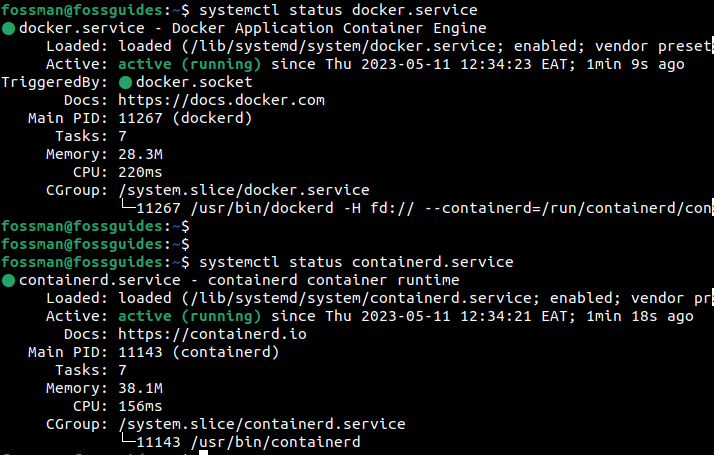
Check Docker and Containerd Services Statuses
Before starting to use Docker, ensure that the required Docker services have been started and are running fine, using the following commands:
$ systemctl status docker.service
$ systemctl status containerd.service
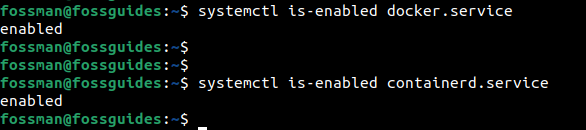
Also ensure that the Docker services are enabled to automatically start at system boot, using the following commands:
$ systemctl is-enabled docker.service
$ systemctl is-enabled containerd.service
Run Docker Commands without Sudo(as a non-root User)
Docker is designed to bind to and listen on a Unix socket, but not a TCP port. The Unix socket is owned by the root user, and when the Docker daemon starts and is running, the Unix socket it creates is only accessible by the root user and members of the docker group.
This means that only any other user(s) can only run Docker commands prefaced by the sudo command to gain root privileges. To allow the current user to run Docker and its commands without sudo, add the user to the docker system group:
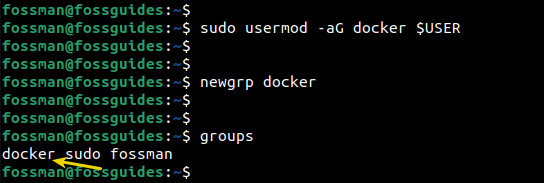
$ sudo groupadd docker
$ sudo usermod -aG docker $USER
To log in to the new group, run the following command, or log out and log back in:
$ newgrp docker
Then ensure that the current user is now a member of the docker group, running the groups command, like this:
$groups
Test Docker Using the Hello-World Image
Now that Docker is installed with some basic configurations, you can test the whole setup by running the following command:
$ docker run hello-world
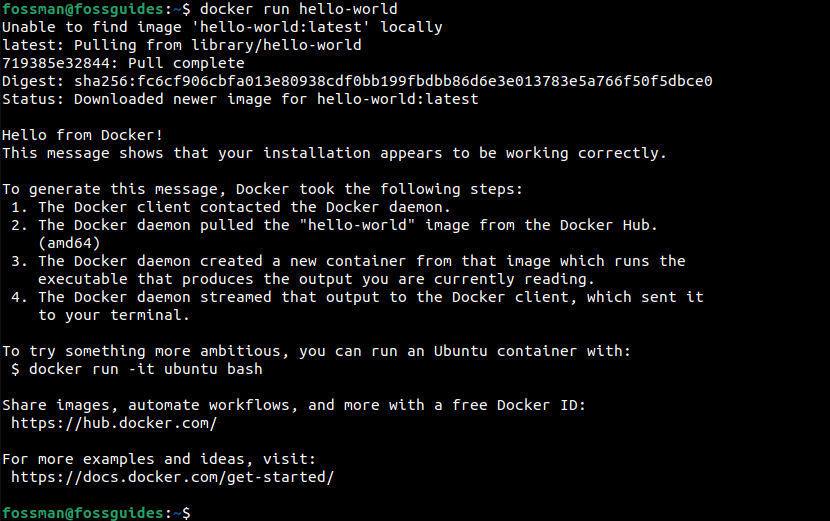
Once the command runs, it should download the Docker hello-world test image and run it in a container. The container will display a message and exit.
Uninstall Docker Engine from Ubuntu
If you want to remove Docker packages(Docker Engine, CLI, containerd, and Docker Compose), run this command:
$ sudo apt-get purge docker-ce docker-ce-cli containerd.io docker-buildx-plugin docker-ce-rootless-extras docker-compose-plugin
You can delete Docker objects/data(images, containers, volumes, and custom configuration files) on your system as shown before.
Conclusion
That’s all we prepared for you in this Docker installation guide. What are your thoughts? Please let us know using the form below.